Free Custom Labels

  • Free Label Maker Online
    • Vintage Labels
    • Round Labels
    • Chalkboard Labels
  • Gifts
    • Pillow Box Template
    • Teacher Appreciation
    • Tea Cookies
    • Thank you for helping me bloom
    • Apple Cider DIY Gift Box
    • Hot Air Balloon Gift Basket
  • Organization
    • Family Address Labels
    • CD Cover Maker
    • Toy Bin Labels
    • Kids School Labels
    • Vegetable Garden Markers
  • Wedding
  • Birthdays and Parties
    • Birthday Stickers
    • Party Hat Template
    • Free Printable Banner Maker
    • Halloween Labels
    • Rosh Hashanah Labels
    • Bar Mitzvah Party Favors
  • Food and Beverage
    • Cupcake Toppers
    • Custom Wine Labels
    • Milk Labels
    • Apple Cider DIY Gift Box
    • Flag Labels
    • Canning Labels
    • Ice Cream Sundae in a Box
    • Printable Beer Labels
    • Recipe Cards
    • Mason Jar Hot Chocolate with Free Custom Labels
    • Fortune Cookie Labels and Bag Toppers
    • Tea Cookies
    • Overnight Oats with Custom Labels
    • Rainbow Cake in a Jar

Bar Mitzvah Party Favors

bar mitzvah favors


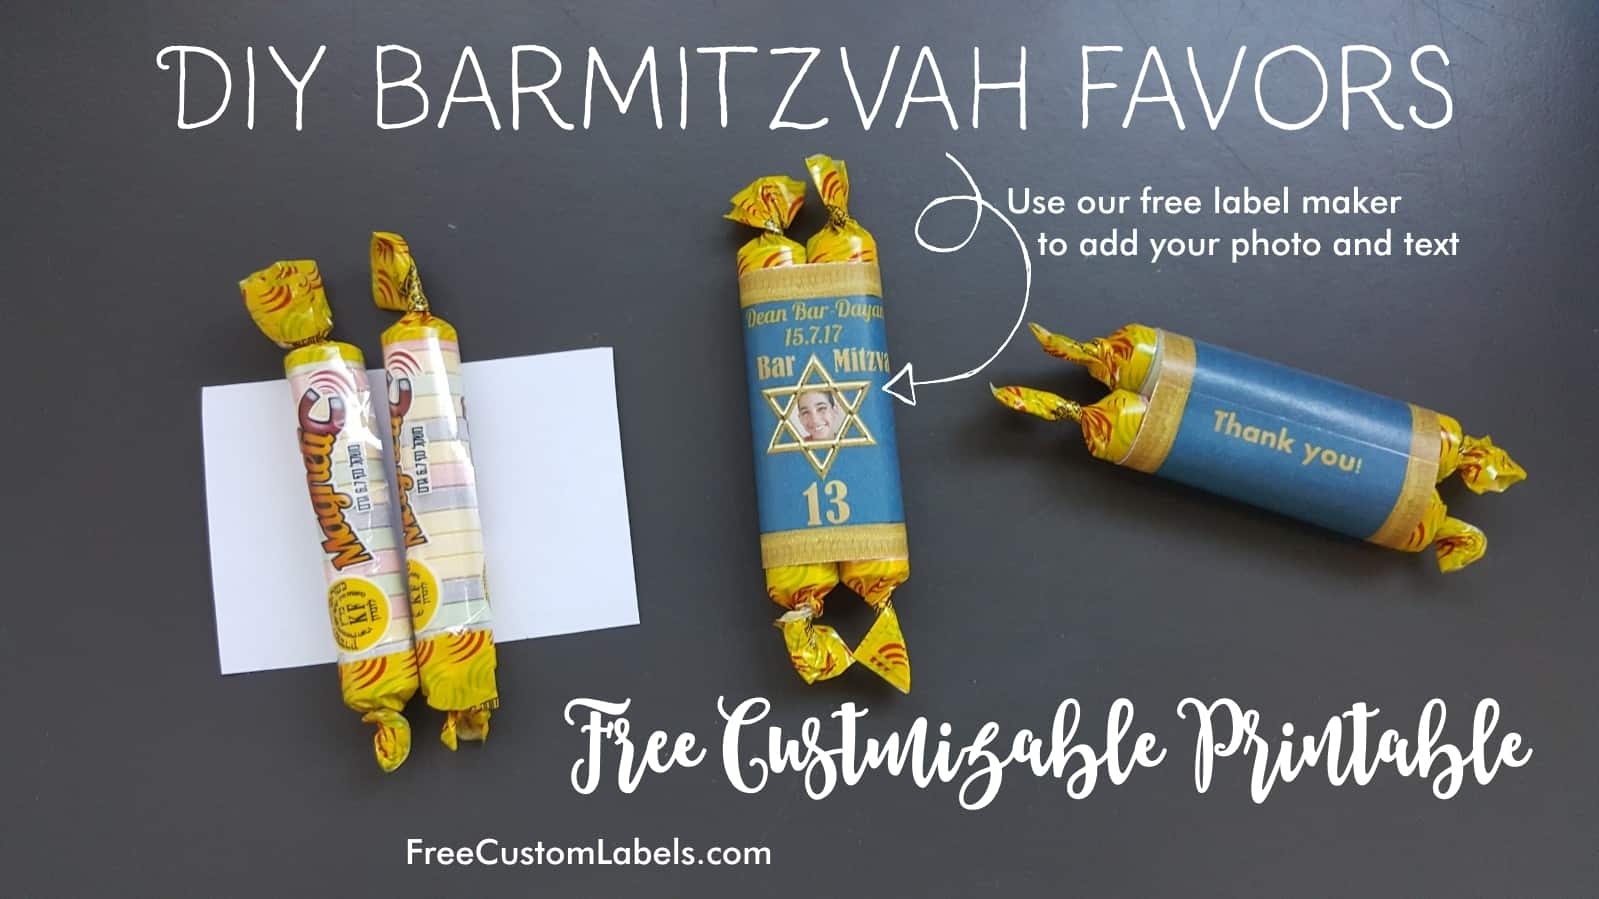
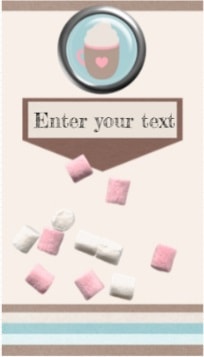
Our free app will enable you to make customized bar mitzvah favors (Tootsie Torahs) in English or Hebrew for your guests free of charge. You can customize the text online (in English and/or Hebrew) and then print at home.

diy bar mitzvah favors

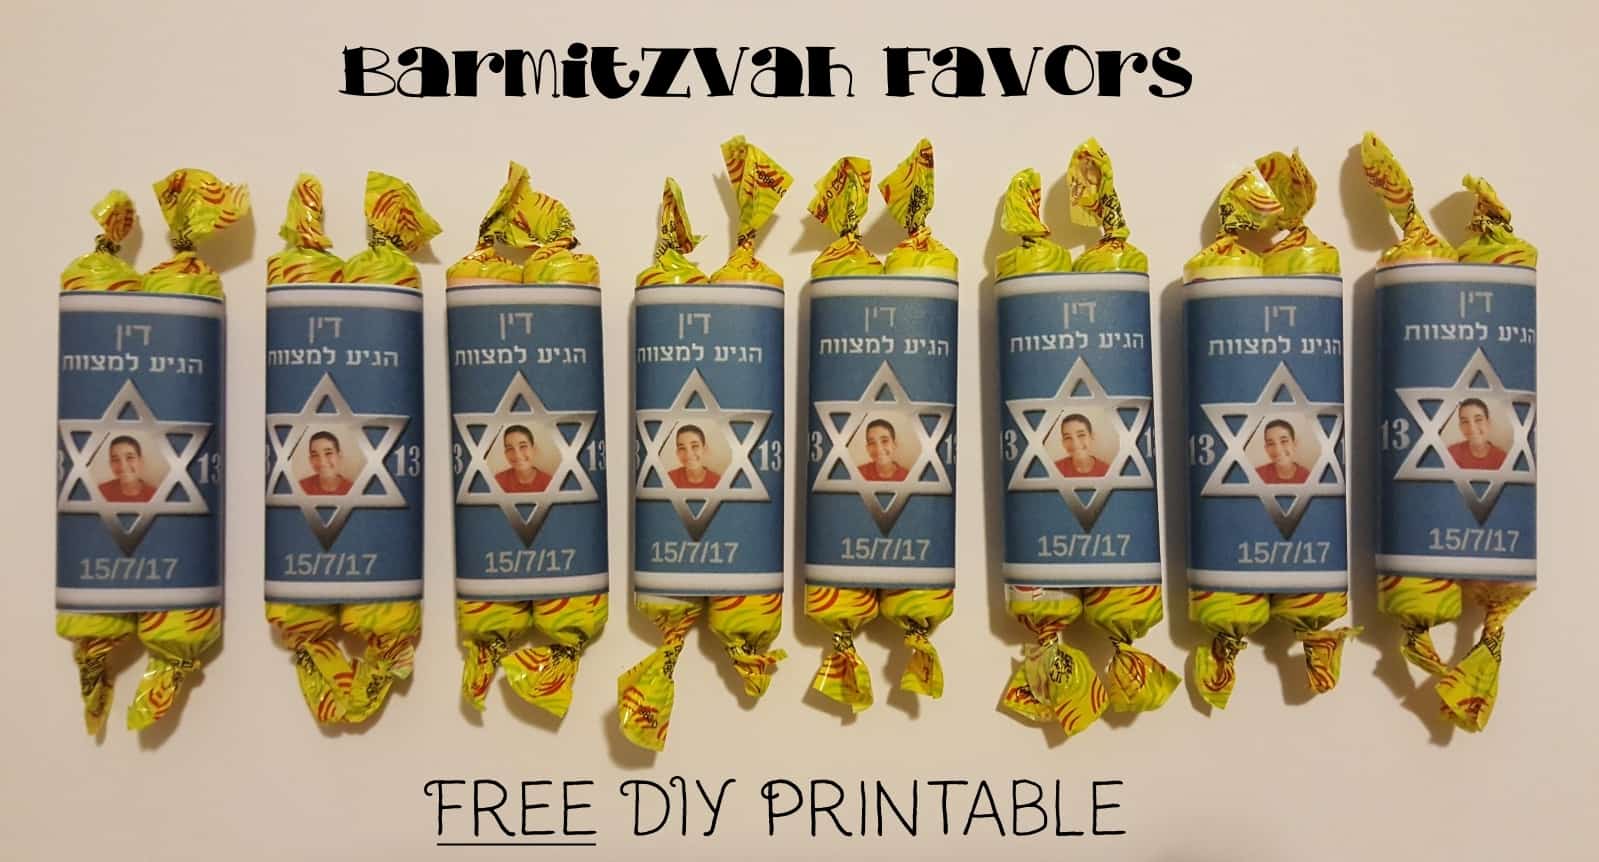
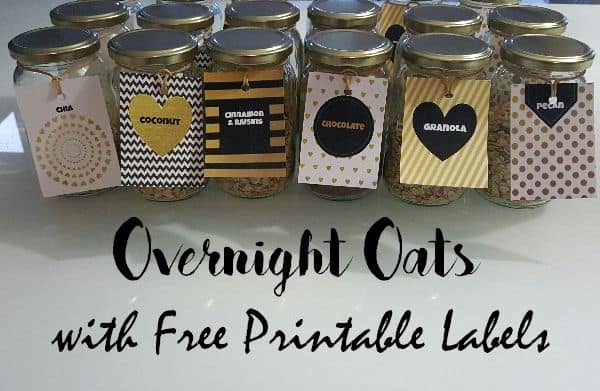
DIY Bar Mitzvah Favors

bar mitzvah party favors

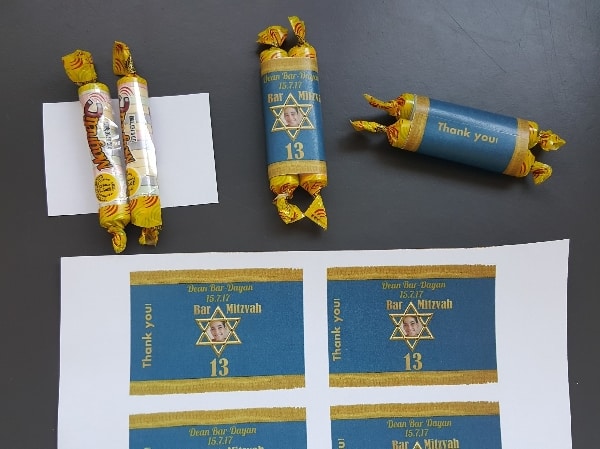
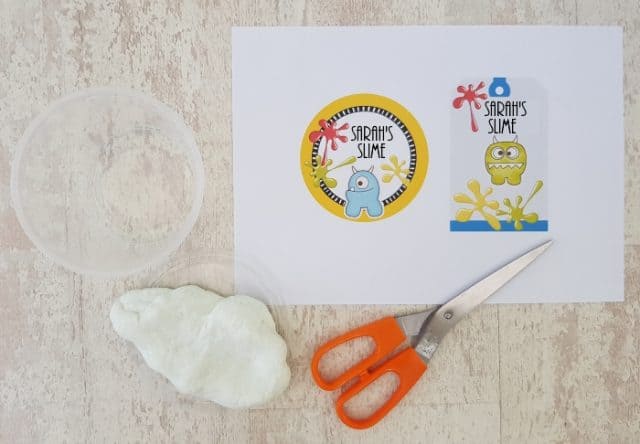
How to Make the Party Favors

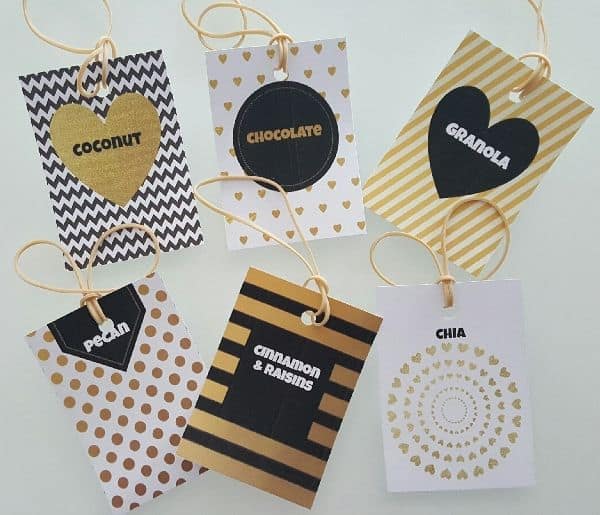
Print the labels with your photo or without a photo.

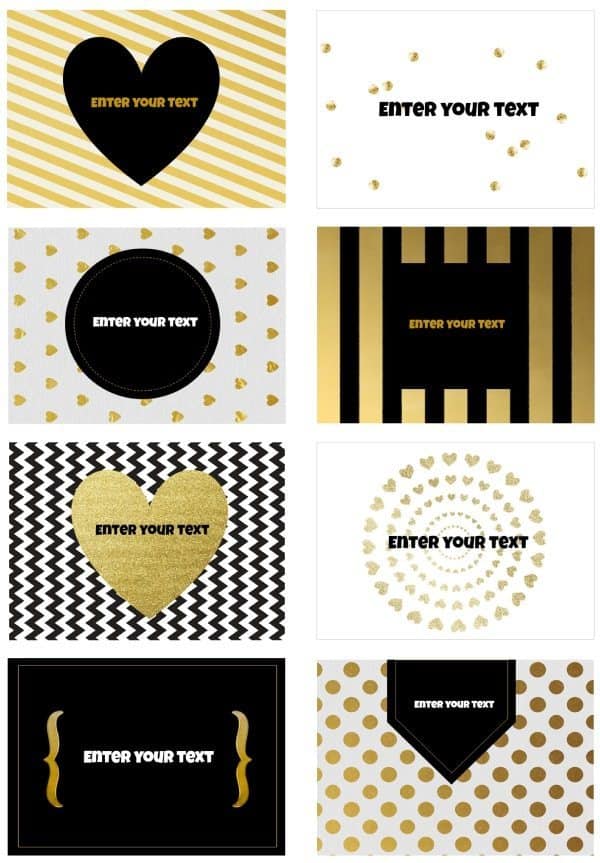
Select the design that you want to use:

With a Photo

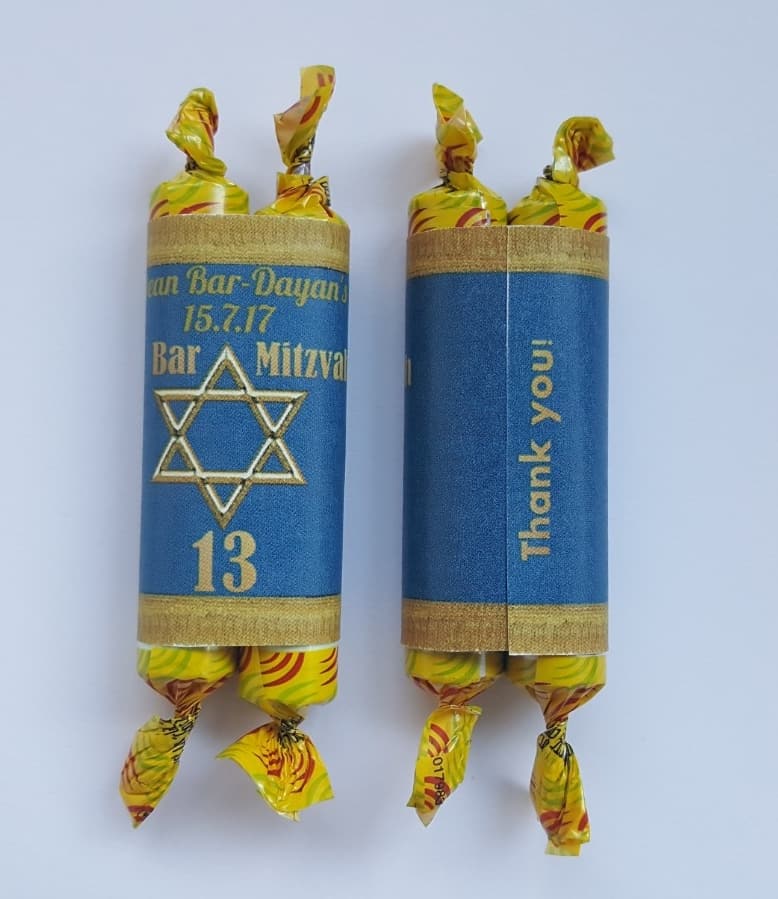
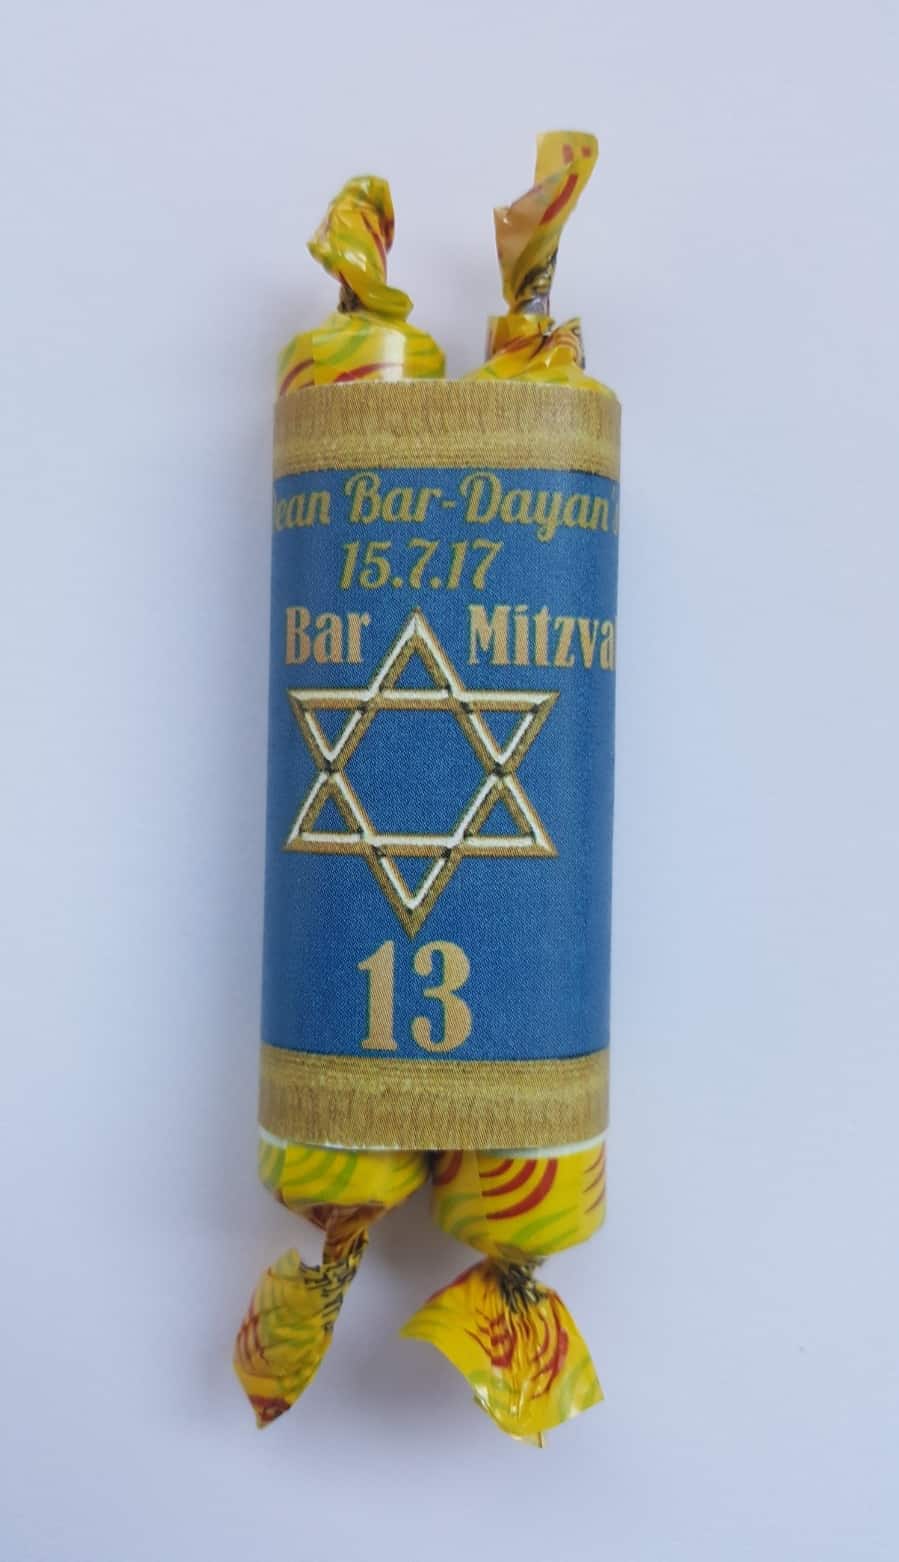
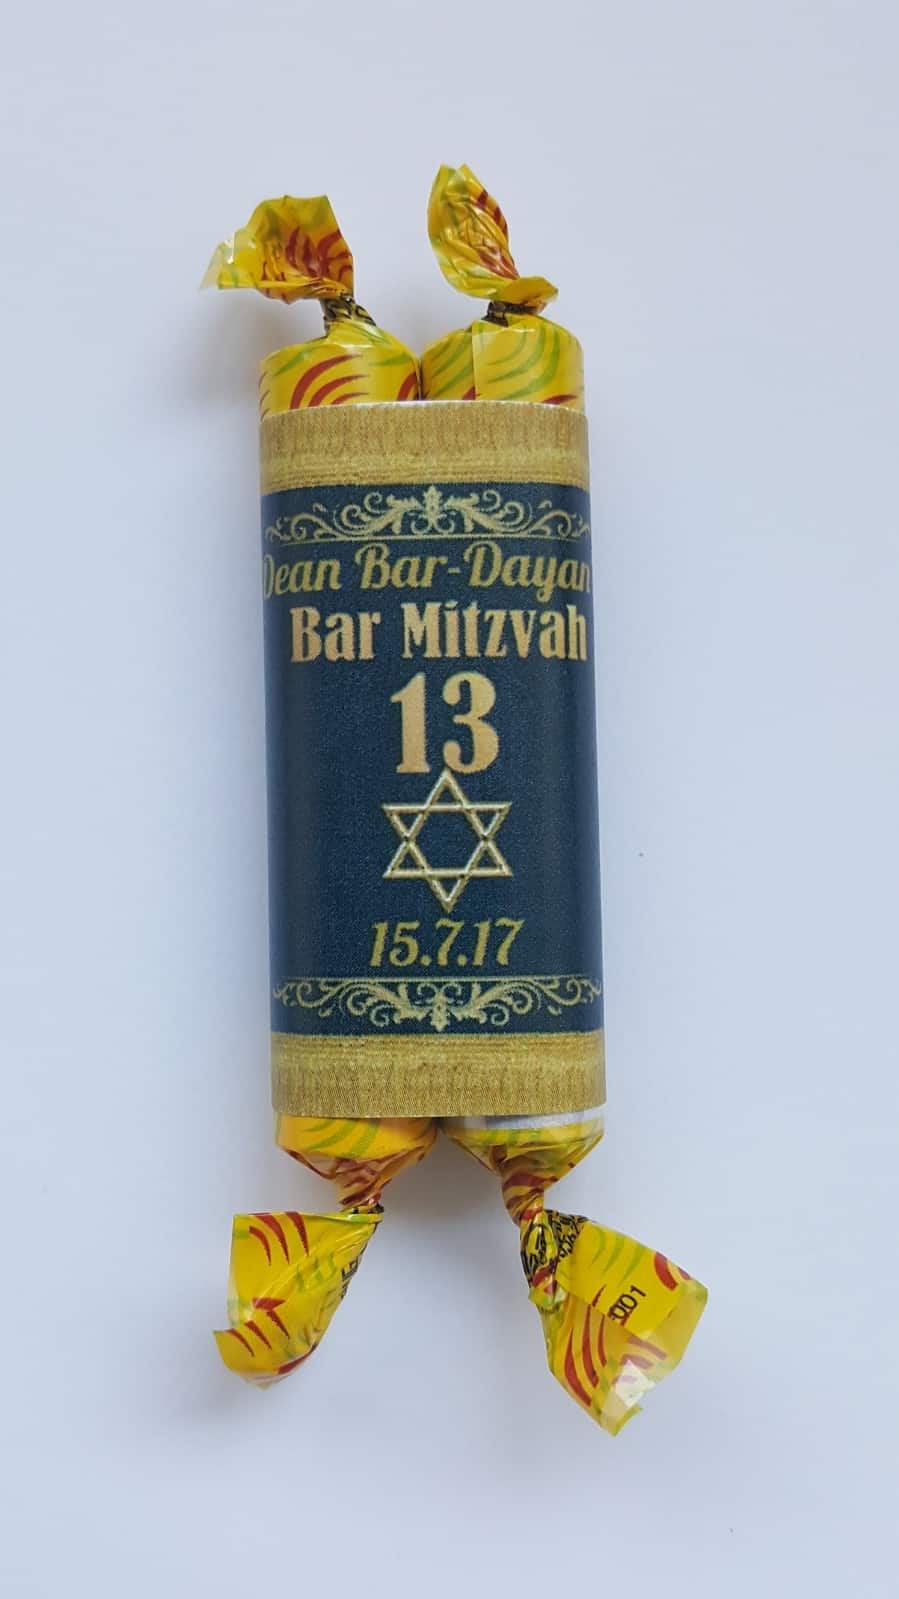
Light Blue and Silver | Navy and Gold | Blue and Gold | Blue and Gold

Without a Photo

Navy and Gold | Light Blue and Silver


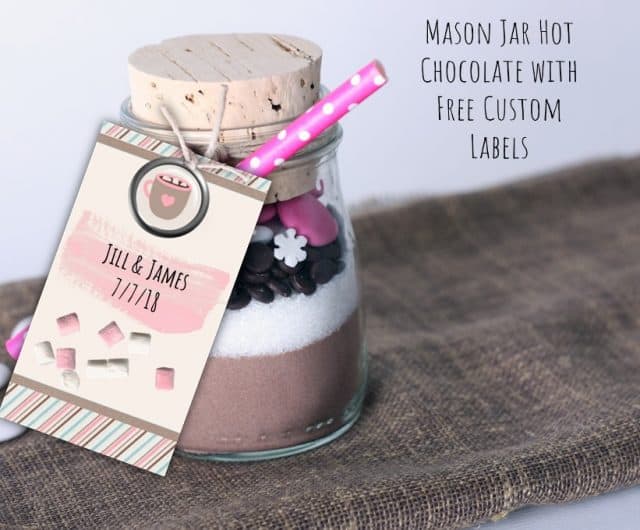
Edit the text and add a photo (if you select the version with a photo). Feel free to change all text. You could also use these favors for a Jewish wedding or Bat Mitzvah.

Print.

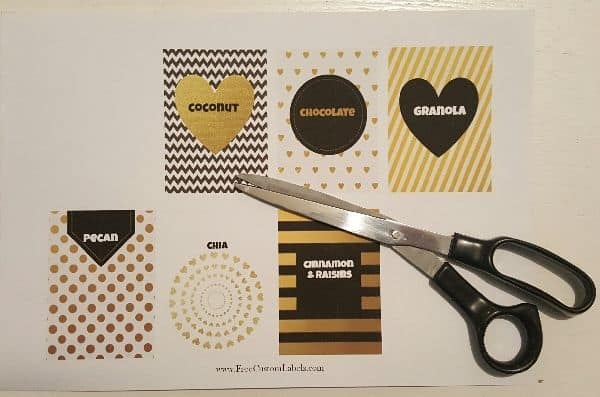
Cut out each square.

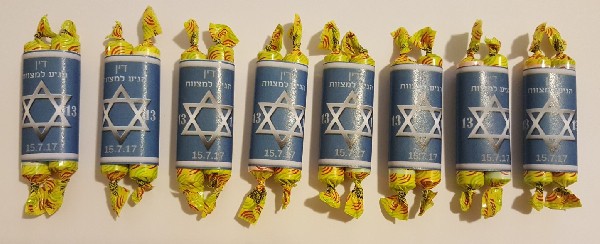
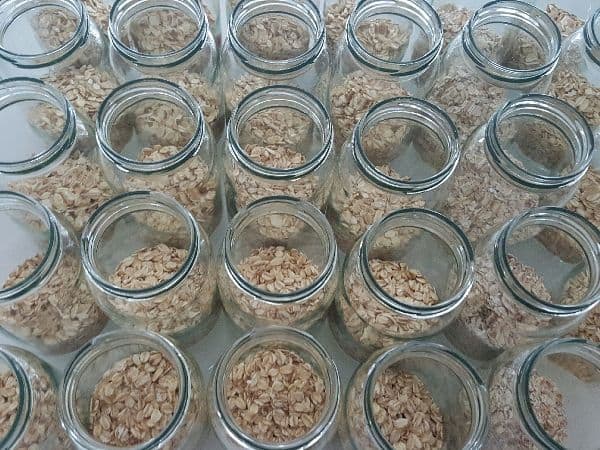
Place two rolls of candy (such as Tootsie rolls) in the middle and roll the paper around the candy.

Adhere with paper glue.


torah

torah favors

bar mitzva favors

torah favor

bar mitzva favor


Filed Under: Gifts

Easy Slime Recipe with Free Slime Labels

slime stickers and labels


Slime is fun to make and to play with. These free printable custom DIY slime labels and stickers will make your homemade slime look cute and unique.  For kids who sell slime, you can make your own personalized slime stickers for your slime shop. You can move the elements around and change the clipart and colors so there is an unlimited number of designs and possibilities. Each slime label will be unique.

There are different types of slime.

Slime with baking soda, contact solution, and even edible slime. I tried many homemade slime recipes that I found online but none of them worked for me. The edible slime didn’t really have a good texture. It wasn’t stretchy at all. It was more like play dough than slime.

The first time I tried to make slime I wasted a lot of slime ingredients (glue, laundry detergent, and shaving cream) until I got it right. Eventually, it worked and I measured the exact quantities to save you wasting ingredients on slime recipes that don’t actually work. I then tried the exact same slime recipe a few more times to ensure that it worked and it did. So if you want to know how to make slime without borax then follow the easy slime recipe below.

Easy Slime Recipe (foolproof)

The following recipe will explain how to make slime with glue and liquid detergent only. I wanted to make slime without borax since I am concerned that borax is not safe.

slime ingredients

Elmer’s Glue Slime Recipe Slime Ingredients

  • 3/4 cup glue (you can use any white liquid glue)
  • 5 tablespoons liquid detergent such as Persil
  • Food coloring, glitter (optional)

How do you make slime?

diy slime

The following recipe makes perfect slime that is stretchy and fun to play with.

  1. Pour the glue into a disposable bowl.
  2. Add one tablespoon of liquid detergent and mix well with a disposable spoon. Mix for about 2 minutes.
  3. Add another tablespoon of liquid detergent and mix well with a disposable spoon. Mix for about 2 minutes.
  4. Add the rest of the liquid detergent and mix well with a disposable spoon. Mix for about 2 minutes.
  5. Knead the slime mixture until it turns into slime with a good texture.
  6. Your slime is ready to play with.

This is the basic recipe. You can make different variations. For example:

Glitter Glue Slime

To make glitter slimes just follower the recipe above and add glitter at the end. Add as much as you want.


Colored Slime

To make colored slime add food coloring. For example, to make pink slime add a few drops of pink food coloring the first time you add detergent and mix.

If you want to know how to make fluffy slime then follow the recipe below.

Fluffy Slime Recipe


This recipe has a different consistency. It is more like a foam slime.

  1. 3/4 cup glue
  2. 5 tablespoons liquid detergent such as Persil
  3. Shaving cream
  4. Food coloring, glitter (optional)

How to Make Slime with Shaving Cream

  1. Pour the glue into a disposable bowl.
  2. Add one tablespoon of liquid detergent and mix well with a disposable spoon. Mix for about 2 minutes.
  3. Add another tablespoon of liquid detergent and mix well with a disposable spoon. Mix for about 2 minutes.
  4. Add the rest of the liquid detergent and mix well with a disposable spoon. Mix for about 2 minutes.
  5. Add some shaving cream. Mix well.
  6. Knead the slime mixture until it turns into slime with a good fluffy texture.
  7. Your fluffy slime is ready to play with.

How to Make Slime Less Sticky

If you follow our easy slime recipe then your slime shouldn’t be sticky. If you tried another recipe or didn’t measure the ingredients then here are two ways to make slime less sticky.

  1. Knead the slime for a while until it becomes less sticky.
  2. If that doesn’t work, then add a bit of liquid detergent until the slime becomes less sticky.


Always wash your hands after you touch any of the slime ingredients and never make or play with slime if you are sensitive to any of the ingredients.


Slime Labels

slime labels

Slime Tags

slime tags

How to Make Slime Stickers and Labels

slime labels and stickers

  1. Click on the slime label and/or tag above to open the online label maker.
  2. Add slime clipart and move around, make larger or smaller.
  3. Edit the text.
  4. Download or print.
  5. Adhere the slime labels to the slime container. If you want to make slime tags you can connect them to the container with ribbon or string.

Filed Under: Gifts

Mason Jar Hot Chocolate with Free Custom Labels

Hot chocolate mason jar favors are so easy to make with this easy recipe and free printable custom gift tags.


Hot chocolate mason jar gift

Hot chocolate mason jar gift

We offer two versions: hot cocoa and mocha (with coffee).  When making DIY wedding favors you might prefer to make mocha and when making party favors for kids the version without coffee will be more appropriate.

DIY wedding favors

You can edit the printable gift tags. There are two designs available:

Gift label
Gift label

Recipes:


Hot chocolate in a mason jar recipe

  • 1 part dry milk
  • 1 part cocoa
  • 1 part sugar
  • 1 part chocolate chips
  • 1 part marshmallows


Mocha in a mason jar recipe

  • 1 part chocolate chips
  • 1 part dry milk
  • 1 part cocoa
  • 1 part sugar
  • 1/2 espresso powder


You can change the ratio if you prefer but keep the layers in this order or any other order that has dark then light then dark, etc.

You can also omit certain layers (such as the dry milk if you prefer to add fresh milk). If you do omit a layer try to arrange it so that you keep the contrast between the layers.


Hot cocoa in a jar gift tag

To make the hot chocolate mix labels open the label maker. To add text click on the A button. You can change the font and make the text larger or smaller. You can also drag it around.

Hot chocolate gift ideas

Use this hot cocoa gift tags printable to make party favors, gifts for teachers, DIY hot chocolate wedding favors or for any other purpose.

Since the text can be edited you can also use the label maker to make hot chocolate bar labels.

hot chocolate mason jar


Filed Under: Food and Drink, Gifts

Ice Cream Sundae in a Box

ice cream sundae gift box


Ice Cream Sundae in a Box

This ice cream sundae gift basket contains everything that you need to make the perfect ice cream sundae except the ice cream. If you are taking it to someone’s home and not traveling too far then you can add a tub of ice cream as well. We have prepared all of the labels and printables for you so it shouldn’t take too long to prepare. You can personalize all of the labels if you want to add your name or a personal message. You can also change the text on the labels if you prefer to use other toppings.

It really doesn’t take that long to prepare but looks really special.

ice cream sundae gift basket

How to make ice cream sundae in a box

Ingredients and equipment:

  • Various toppings
  • Cellophane bags (long ones for the ice cream cones and shorter for other toppings. You can also just cut the long bags if you only want to buy one kind).
  • Ice cream cones
  • Scissors
  • Stapler
  • Cardstock for printer
  • Box or basket
  • Spoons

Method:


  1. Insert toppings into cellophane bags.
  2. Prepare the bag toppers. There are two different designs for you to choose from: design 1 and design 2. Change the text if you are using different toppings. Print on cardstock.
  3. Cut out each bag topper.
  4. Fold over bag and staple closed.

sundae toppings

How to make the ice cream sundae gift box

  1. There is a printable label available for the outside cover and another one for the inside cover (with a personalized message).
  2. Print on regular paper (you don’t need cardstock but you can use it if you prefer)
  3. Adhere the labels to the box with paper glue.
  4. Arrange the toppings in the box.
  5. Add anything that you want to add such as an ice cream serving spoon, colored spoons, ice cream bowls, etc.

More ice cream sundae basket ideas

The toppings here are only samples of those that you can use. You can also use wafers, nuts, dried fruit, etc.

You can also put the toppings in glass jars and use the printables to create custom labels. Just print on paper and apply with paper glue or print on label paper.


Filed Under: Gift Box, Gifts

Thank you for helping me bloom

Thank you cards

These thank you cards read “Thank you for helping me bloom” but you can customize the text if you want to write anything else.


They go well with cut flowers, a pot plant, or even flower-shaped candy.

Thank you gift cards


label maker

Thank you card

label maker


Filed Under: Gifts, Teacher Appreciation

Overnight Oats with Custom Labels

overnight oats


I love overnight oats. They are so easy to make and fun to eat. Even though they only take a few minutes to make, I often find myself too busy or lazy to make them the night before I need them. I started making enough bottles for a week or two when I have the time. That way, each night, I choose the flavor that I want for the next morning and just add milk. I have lots of bottles in the pantry and I only add the dry ingredients. I’m very into making things in bulk since it is a huge time saver. If you do make them in bulk you will want to be able to recognize the flavor instantly. That’s why I created these custom labels for my overnight oats. I just put a label on the mason jar and that way even if I prepare the oats a few weeks later I will still remember what I put in the jar.

Overnight oats also make great gift boxes. The custom labels add a professional personalized look. The labels are available in many colors and styles.

I have a few friends who are very health conscious. I recently made them each an Easter gift basket with these bottles of overnight oats. They loved them!

How to make an overnight oats gift box

  • Put the mason jars in the dishwasher to sterilize them.

Mason jars

  • Fill them with oats according to the overnights oats recipe that you want to use.

How to make overnight oats


  • I made a funnel with a piece of paper.

Making overnight oats

  • Decide which toppings you are going to add and create a custom label for each topping. Cut out each label.
  • Punch a hole at the top of each label and attach an elastic band.

Elegant labels

  • Add the toppings.
  • Close the mason jar and attach the label.
  • Put the mason jars in a gift box.

overnight oats

  • Wrap with cellophane. You can also attach recipe cards which can be printed from this site too (also free).

overnight oats gift pack


Filed Under: Food and Drink, Gifts

Hot Air Balloon Gift Basket

hotair balloon gift basket


A hot air balloon gift basket is a cute way to create a gift basket, Christmas or Purim baskets or to turn a simple gift into something special. It only takes a few minutes to make. We have used the polka dot labels to create a gift tag but you can use any other custom gift tag on this site.

How to Create the DIY Gift Basket

To create the gift basket you will need:

  • A basket
  • Chocolates and/or candy
  • A balloon filled with helium
  • String

Instructions:


  • Fill the basket with chocolates and/or candy.

gift basket

  • Personalize the custom labels and add your own message.
  • Print the labels on card stock.
  • Punch a hole at the top of the label.
  • Tie the label to the gift basket with ribbon or string. It should be tied tighter than it was in this picture.
  • Connect the string to the balloon on one end and the basket on the other end.

This is a great way to make Christmas gift baskets! You can type “Merry Christmas” or “Happy Holidays” on the gift tag since the text is totally customizable. You can also make Purim gift baskets (just type “Happy Purim” on the gift tag).


Filed Under: Gifts, Purim

Black and Gold Labels

Free personalized labels


The black and gold label above can be customized and printed below. The monogram sticker can be customized with our free monogram maker.

black and gold labels

label maker

These free custom labels are elegant in black and gold. They come in eight different styles. They can be used as labels or as tags. You can add your own text before you print them.

How to Make these Custom Labels

  • Click on “customize” to edit the text.

label maker

  • Click on download to download the custom labels to your PC.
  • Print on cardstock.
  • Cut out each label.

black and gold labels


  • elegant labelsIf you want to use them as labels just adhere them with paper glue.
  • If you want to use them as tags then punch a hole at the top or in one of the corners.
  • Attach an elastic band or a ribbon.

Elegant labels

These printable labels are also available in landscape format.

gold labels

label maker


Filed Under: Event, Food and Drink, Gifts, Wedding

Tea Cookies

cookies-with-custom-labels
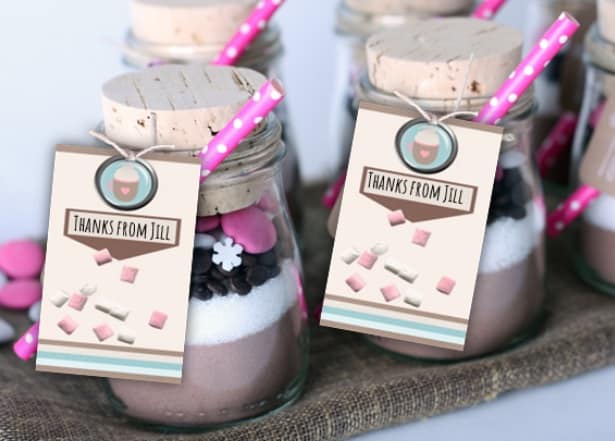
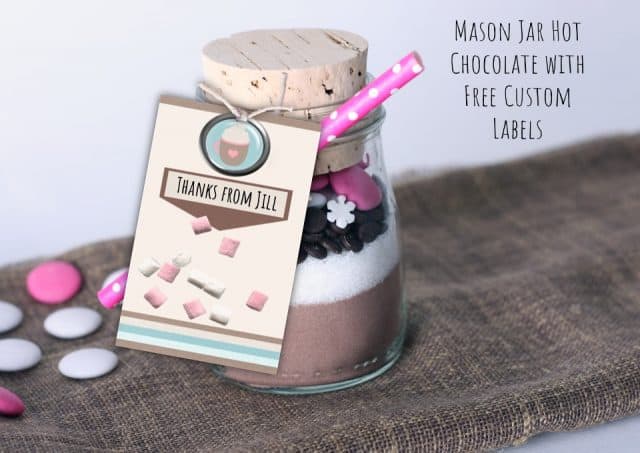
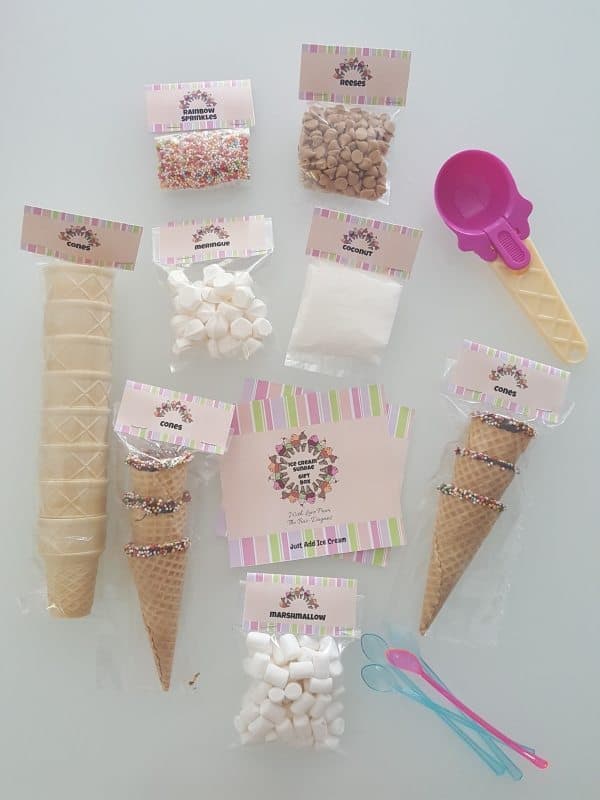
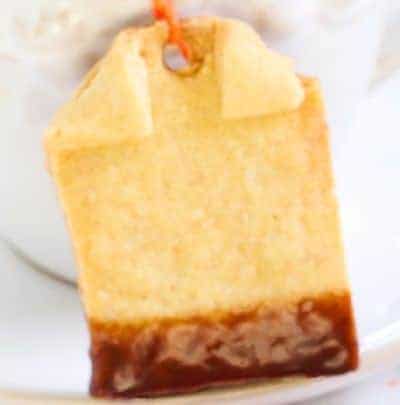
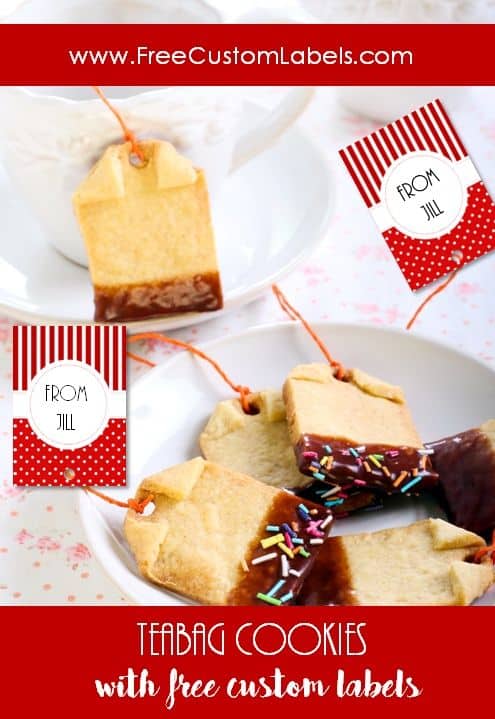
These cookies are so easy to make and they make such a nice DIY gift that is sure to be appreciated. You can wrap them up nicely in a nice box with a custom label on each cookie. You can write a different message on each label. These can be served at weddings with silver sprinkles, at birthday parties with hot chocolate or to guests with coffee or tea.


Ingredients:

  • Cookie dough
  • 1/2 cup heavy cream
  • 4 ounces chocolate
  • Colored sprinkles

tea cookie


Method:

  1. Roll out the cookie dough.
  2. Cut into rectangles.
  3. Fold the two top corners inside (see picture).
  4. Make a hole in the top middle.
  5. Bake according to the cookie dough instructions.
  6. If the hole in the top has closed then pierce the cookie again while it is hot to open the hole.
  7. Allow to cool.
  8. Chop the chocolate into small pieces and then place into a small bowl.
  9. Heat the cream over medium heat until it comes to a boil. As it comes to a boil remove from the heat.
  10. Pour the cream over the chocolate and whisk until the chocolate melts.
  11. Dip the bottom of the cookie in the chocolate mixture.
  12. Sprinkle colored sprinkles on the chocolate.
  13. Allow to dry.
  14. Create custom labels.
  15. Tie string to the cookie on one end and the custom label on the other end.


If you are giving the cookies as a gift then place them in a gift box.


Filed Under: Birthday Party, Event, Food and Drink, Gifts, Wedding

Rainbow Cake in a Jar

Rainbow cake in mason jars to make a DIY mason jar giftThis rainbow cake in a jar looks really pretty and makes a great gift. It’s a perfect solution when you need a few small gifts since the recipe will make about four small rainbow cakes (depending on the size of the mason jars and the cake mix used). Once you have completed the rainbow cake you can print the custom labels to personalize the gift and add a more professional touch.
There are two different methods to make a rainbow cake in a mason jar. The first method is to pour the cake batter into the mason jar, layer by layer, and then bake the batter in the mason jar. The layers tend to mix and it often creates a messy finish. The advantage is that you don’t waste any cake batter and you will probably get around 3 to 4 rainbow cake mason jars.
Another method is to bake the colored cakes and then cut out circles the size of the mason jar. You then spread white frosting on each circle and carefully insert each layer into the mason jar, layer by layer, until they are all inside the jar. The disadvantage is that you will waste some cake and will probably only get around 2 to 3 rainbow cake mason jars but you can make cake pops with the leftovers. You can also just insert the leftovers into a jar and I’m sure that there will be many volunteers to eat the cake even if it doesn’t look perfect!
This method creates a perfect finish and makes your gift look spectacular!
Ingredients:


  • 1 Box white cake mix and any other ingredients required according to the instructions on the box
  • Ready-made / home-made white frosting
  • Gel food colors (red, orange, yellow, green, blue and purple)
  • Wide mouth mason jars
  • Wet wipes or paper towels (to wipe the jar down if necessary)
  • Disposable spoons
  • White ribbons
  • Rainbow sprinkles

Method:


  1. Wash and dry the mason jars.
  2. Preheat the oven to 350 degrees Fahrenheit or 180 degrees Celsius.
  3. Make the white cake batter according to the directions on the box.
  4. Divide the batter into six portions (you can make more or less colors if you prefer).
  5. Add a different food color to each portion. Since food color is often very concentrated add a few drops and mix and then only add more if necessary. It is easy to add more but problematic if you add too much.

To bake the rainbow cake in the Mason jar:

  1. If you are going to bake the rainbow cakes in the mason jars then spoon about a quarter of the red batter into the first jar. Then add the orange batter, then the yellow, then the green, then the blue and then the purple.
  2. If the batter drips on the jar then wipe it clean before moving on to the next layer.
  3. Repeat these steps until you have finished all of the batter.
  4. Fill the bottom of a glass baking dish with about a half inch of water. This will prevent the cake from browning. Carefully place the mason jars in the baking dish.
  5. Bake for about half an hour or a little longer if necessary (until a toothpick comes out clean). It is important that the cake is ready yet not browned as it won’t look as good.

To bake the rainbow cake before inserting in the mason jar:

  1. Pour each portion of batter into a small baking dish.
  2. Bake until a toothpick comes out clean (go according to the cake instructions but check it early since you are only baking part of the cake box and it should be ready sooner).
  3. Allow to cool.
  4. Cut out circles the size of the mason jar’s opening. If you do not have a round cookie cutter then use the jar to cut the cake into circles. You can also use a glass cup if you have one the same size.
  5. Spread each circle with white frosting and then gently insert into the mason jar. Start with the red cake, then add the orange cake, then the yellow, then the green, then the blue and then the purple.

For both methods continue from here:

  1. Add frosting.
  2. Decorate with colored sprinkles.
  3. Connect a spoon to each mason jar and tie with a ribbon or string.
  4. Make a heart shaped chalkboard custom label and adhere with paper glue (unless you print on sticker paper)

Filed Under: Gifts

  • 1
  • 2
  • Next Page »

Search by Purpose

Birthday Stickers
Printable Banner Letters
Kids School Labels
Table Number Templates
Gift Labels
Cake Toppers
Cupcake Toppers
Canning Labels
Toy Bin Labels
Wine Labels
Banner Maker
Garden Markers
Flag Straws
Recipe Cards
CD Cover Template
Family Labels
Scavenger Hunt Card Templates
Pinwheel Template
Pillow Box Template
Slime Labels

Free Label Maker Online

Beer Label Maker
Wine Label Maker
Recipe Card Maker
CD Label Maker
Address Label Maker
Vintage Label Maker

Search by Shape

Round
Heart
Oval
Flag
Bracket
Rectangle

Search by Style

Vintage
Artistic
Chalkboard
Colorful
Elegant
Hand Drawn

Search by Occasion

Back to School
Wedding
Birthday
Halloween
Christmas
Easter
Jewish New Year (Rosh Hashanah)
Bar Mitzvah

Why use our custom labels?

  • Free
  • Wide array of designs, shapes, colors and sizes
  • Instant download
  • No software required
  • No registration required
  • No minimum quantity
  • No waiting
  • You choose the quality of the label (you decide on what paper to print)
  • Personalize with your text, logo or photo
  • No shipping required
  • Make a unique label for each person
  • High res files

New!

  • Bar Mitzvah Party Favors
  • Party Hat Template
  • Birthday Stickers
  • Easy Slime Recipe with Free Slime Labels
  • Mason Jar Hot Chocolate with Free Custom Labels
  • DIY Christmas Crackers
  • Kids School Labels
  • Ice Cream Sundae in a Box
  • Hand Drawn Labels
  • Artistic Labels

Subscribe to our Newsletter

subscribe

Privacy Policy

Terms of Use

Creative Commons LicenseThis website is licensed under a Creative Commons Attribution-ShareAlike 4.0 International License. You can share materials from this website for commercial and non-commercial use but you must link to and give credit to the source.

DMCA.com Protection Status

Any use of our images – including distribution, reproduction, modification and/or public display – without giving credit to this website or without receiving prior written permission is strictly prohibited.

Contact Us

Copyright © 2025

We use cookies to ensure that we give you the best experience on our website. If you continue to use this site we will assume that you are happy with it.Ok