
How to Make Rainbow Cake in a Jar
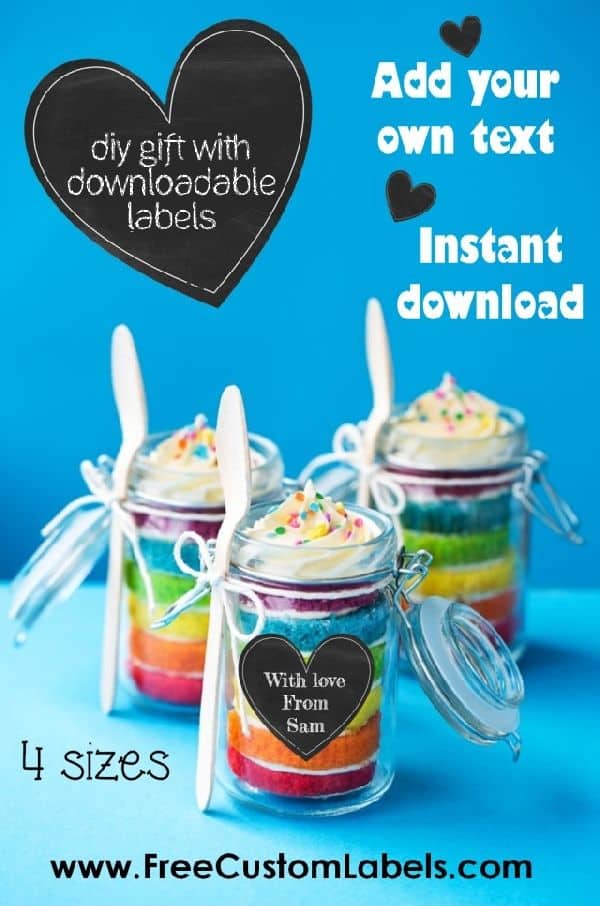
This rainbow cake in a jar looks really pretty and makes a great gift. It’s a perfect solution when you need a few small gifts since the recipe will make about four small rainbow cakes (depending on the size of the mason jars and the cake mix used). Once you have completed the rainbow cake you can print the custom labels to personalize the gift and add a more professional touch.
Two ways to make rainbow cake in a jar
There are two different methods to make a rainbow cake in a mason jar. The first method is to pour the cake batter into the mason jar, layer by layer, and then bake the batter in the mason jar. The layers tend to mix and it often creates a messy finish. The advantage is that you don’t waste any cake batter and you will probably get around 3 to 4 rainbow cake mason jars.
Another method is to bake the colored cakes and then cut out circles the size of the mason jar. You then spread white frosting on each circle and carefully insert each layer into the mason jar, layer by layer, until they are all inside the jar. The disadvantage is that you will have some leftover cake and will probably only get around 2 to 3 rainbow cake mason jars, but you can make cake pops with the leftovers. You can also just put the leftovers into a jar and I’m sure that there will be many volunteers to eat the cake even if it doesn’t look perfect! This method creates a perfect finish and makes your gift look spectacular!
What you need
- 1 box white cake mix and any other ingredients required according to the instructions on the box
- Ready-made / home-made white frosting
- Gel food colors (red, orange, yellow, green, blue and purple)
- Wide mouth mason jars
- Wet wipes or paper towels (to wipe the jar down if necessary)
- Disposable spoons
- White ribbons
- Rainbow sprinkles
Method
- Wash and dry the mason jars.
- Preheat the oven to 350 degrees Fahrenheit or 180 degrees Celsius.
- Make the white cake batter according to the directions on the box.
- Divide the batter into six portions (you can make more or less colors if you prefer).
- Add a different food color to each portion. Since food color is often very concentrated add a few drops and mix and then only add more if necessary. It is easy to add more but problematic if you add too much.
Option 1: Bake the rainbow cake in the mason jar
Please note: most canning jar manufacturers do not recommend putting their jars in the oven, because sudden temperature changes can crack the glass. If you choose this method, use jars marked oven-safe, never put cold jars into a hot oven, and let the jars cool slowly on a rack or towel rather than a cold counter. Option 2 below is the safer choice.
- Spoon about a quarter of the red batter into the first jar. Then add the orange batter, then the yellow, then the green, then the blue and then the purple.
- If the batter drips on the jar then wipe it clean before moving on to the next layer.
- Repeat these steps until you have finished all of the batter.
- Fill the bottom of a glass baking dish with about a half inch of water. This will prevent the cake from browning. Carefully place the mason jars in the baking dish.
- Bake for about half an hour or a little longer if necessary (until a toothpick comes out clean). It is important that the cake is ready yet not browned as it won’t look as good.
Option 2: Bake the cake first, then layer it in the jar
- Pour each portion of batter into a small baking dish.
- Bake until a toothpick comes out clean (go according to the cake instructions but check it early since you are only baking part of the cake box and it should be ready sooner).
- Allow to cool.
- Cut out circles the size of the mason jar’s opening. If you do not have a round cookie cutter then use the jar to cut the cake into circles. You can also use a glass cup if you have one the same size.
- Spread each circle with white frosting and then gently insert into the mason jar. Start with the red cake, then add the orange cake, then the yellow, then the green, then the blue and then the purple.
Finishing your rainbow cake jars (both methods)
- Add frosting.
- Decorate with colored sprinkles.
- Connect a spoon to each mason jar and tie with a ribbon or string.
- Make a heart shaped chalkboard custom label and adhere with paper glue (unless you print on sticker paper). See all our heart labels for more sizes.
Tips
- Gel food coloring gives brighter colors than liquid coloring and doesn’t thin the batter.
- Make the cake the day before you give it, and keep the jars in the fridge if your frosting needs it.
- Write “eat by” on the label so the person you give it to knows when to enjoy it.
Troubleshooting
- Colors look dull or muddy: use gel food coloring and mix each color in its own bowl with a clean spoon.
- Layers mixed together (Option 1): spoon the batter in gently, and fill the jar only about halfway because the cake rises as it bakes.
- Cake domed above the rim: let it cool, then trim the top level with a knife before frosting.
- Cake circles won’t fit (Option 2): cut the circles slightly smaller than the jar opening and press them down gently with the back of a spoon.
- Messy frosting: put the frosting in a zip bag, snip off one corner and pipe it in.
How long does rainbow cake in a jar keep?
It is best eaten within 2 to 3 days. Keep the lids on so the cake doesn’t dry out, and keep the jars in the fridge if your frosting contains cream cheese or fresh cream. Write the date on the label so the person you give it to knows when to enjoy it.
Gift ideas
- Birthday: add a candle to the spoon and a “Happy Birthday” label.
- Pride or rainbow party: serve one jar per guest instead of slicing a cake.
- Teacher or neighbor gift: tie on a label that says “You make the world more colorful”.